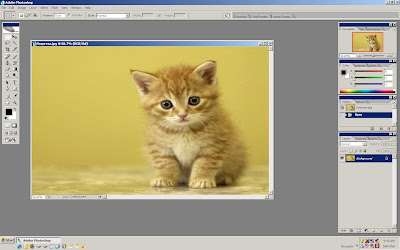
As usual you will require a copy of photoshop and a picture to play around with, for purpose of this small tutorial i have decided to use this picture of a cute little kitten so lets get started shall we

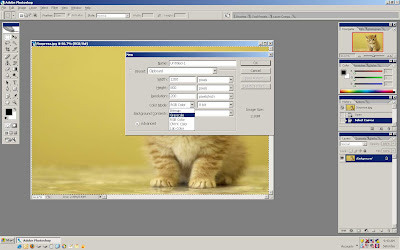
1. Open the image in photoshop and press CTRL+A (to select all) than press CTRL+C (Copy) once you have copied the image press CTRL+N (To open new image) here what you will do is set the color mode to gray scale, see the following image for illustaration.

Once you have a new blank window open press CTRL+V to paste the image into place, Notice it would be black and white now.
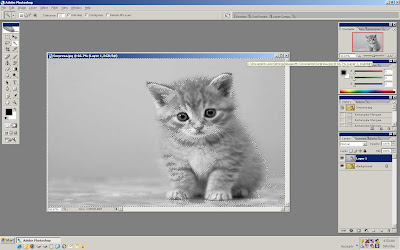
2. Now you have two images, one in color and one in black and white, go to black and white image select all by CTRL+A and than copy it to clip board by CTRL+C now go to the color image and paste the image there by pressing CTRL+V. You will notice in the layers dialogue box (towards your right as in the image below) two layers one in b&w (on top) and the original image in color below it. Refer to the image below

3. Now select magic wand (either by pressing W on your keyboard or by clicking on the icon in the toolbar as shown in the image above) What magic wand does is select pixels by color matching and it selects an area with matching color. There are other methods of selecting and editing image but we shall use magic wand in this tutorial.
Once you click magic wand and click on the image it will result in a abrupt selection such as shown in the image above, It may look complicated but don't freak out.
5. You will notice that a lot of places outside and even inside the kitten are selected, Our aim in this excersise is to roughly select the outline of the kitten, For that purpose we will now edit our selection. For this purpose at least my favorite way of achieving it is to use Marquee tool (Press M on the keyboard). Once you have the tool selected you can Add further area to your selection or you can Remove area from the selection, This can be achieved by press ALT (You will see a small - sign) to remove selection or you can use CTRL (You will see a small + sign) to add to your selection. Play around by adding and subtracting the selection till you approximately have the outline of the kitten selected. It may sound hard but it is not give it a shot. Refer to the image below.
6. Now the hardest part is over so congratulate yourself, You can pull off two effects here,
1. You can make kitten black and white and background colored
2. You can make kitten colored and background black and white.
We shall see both of the effects
6.1 With the selection which you made back in step 5 simply press the DEL key and you will get a nice black and white kitty cat with colored background like the image below
6.2 Now lets revert back and try another effect, For that purpose locate the "History" box on your right, History keeps track of all the changes you have to your image, You can set how much do you want to keep in history by changing the photoshop preferences. For this excersise you need to go one step back so simply click on the previous item in the history box to go back to previous state. Refer to the image below
6.3 Now we have to try the other effect, Go to SELECT menu and than select INVERSE, Now simply press the DEL key and presto you will see the kitten in black and white while having the kitten in color like in the image below.
It's not rocket science, What we did was simply delete something from the black and white layer so that we can see what is underneath that layer (which would be identical color copy) so it gives you the effect of having black and white over color and vice versa. This is a very popular effecct widely used by many studios and they charge you an ample amount of money to do something simple as this.
This was a very vague overview how to pull this effect off, If you have any questions or querries than do let me know will be happy to answer! :)


1 comment:
why not find out more buy replica bags Going Here replica ysl bags see this here best replica designer bags
Post a Comment